Showing posts with label art. Show all posts

Saturday, July 31, 2010

Cyanotypes

The children have been learning about the different parts of a plant, including the different structures present in leaves, and we have been discussing how plants make their own food through the process of photosynthesis. Photosynthesis begins when light is absorbed by proteins that contain chlorophyll (photons hit the chlorophyll and knock loose an electron) which begins an incredibly complex process in which energy from the sun is used to convert carbon dioxide into organic compounds (glucose) and oxygen. The ability of plants to perform this vital function can be traced back to cyano-bacteria (bluish green bacteria ) which were the very first plants on Earth, and responsible for making the oxygen that built up in the atmosphere to make life possible.

Needless to say, it is difficult to comprehend how sunlight, carbon dioxide, and water can make carbohydrates and oxygen. Cyanotypes provide one opportunity for children to get a hands on, sensorial, experience with a photo-reactive chemical process and the opportunity to achieve a better understanding of chemical pigments by analogy.

Cyanotypes, or "sun prints," are an antique photographic printing process which is distinctive due to it's Prussian blue monochrome prints. The method was invented during the Victorian era, but later abandoned except as a copying method for documents and plans as "blueprints." The cyan-blue prints are created by exposing photosensitive paper to ultraviolet light as a result of the photosensitivity of iron salts. Of course, you don't have to understand any of the chemistry involved or appreciate any of the historical significance to enjoy making prints.

This is an incredibly simple lesson to set up and 2-6 year old children can make prints independently if you supply an hourglass or simple method for ensuring that the paper is exposed to adequate amounts of sunlight (we achieved good results with a 3 minute egg timer). Here is how the lesson looks on the shelf.


The children select natural artifacts, place them on the photosensitive paper, and wait until three minutes has passed. They seemed very interested in the color transformation of the paper; additionally, many found watching the sand pass through the hourglass to be an exciting point of interest.


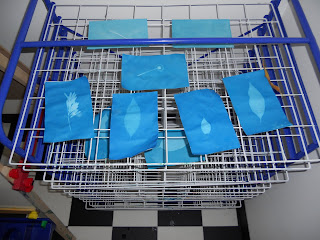
Then the children develop their prints by rinsing them in water (where the unreacted, water-soluble, iron salts are washed away). We intensified the characteristic blue effect by adding some lemon juice to the water bath.


I recommend supplementing the experience with an art appreciation lesson wherein you show the children some classic cyanotype prints; in particular, Anna Atkins, an English botanist and the first female photographer, has some very beautiful seaweed prints in her book Photographs of British Algae.


Older children can experiment with toning (changing the color of the print)- oolong tea works well! Also, here is something else that I plan to try (and present to the children if it is successful): http://www.alternativephotography.com/wp/processes/photsynthesis/photosynthesis-grow-your-own-photographic-supplies

Thursday, January 7, 2010

Punching/Perforating

The cubbies are stuffed full of pieces of construction paper riddled with tiny holes, and I must say that I feel as if I have re-discovered punching.

"Punching," or "perforating" is a classic Montessori activity in which children trace a form (often a continent or plane geometric figure from the metal insets or the geometric cabinet) and use a punch to make very precise perforations along the outline. The resulting figure can be hung as a decoration (somewhat reminiscent of a colonial tin punch) or detached from the paper.

We encourage children to engage in this activity because it is a fabulous way for children to develop their pincer grasp, improve fine motor coordination, and strengthen their fingers for handwriting.

In the past, I have used this activity with older children who were having difficulty with handwriting (the thought process being that it would isolate problems with the pincer grasp from issues of letter formation and allow the child to get additional handwriting practice under the guise of being a fun art activity and without it feeling repetitive or anxiety inducing) with mixed success (often, those children seemed to tire of it quickly and were reluctant to repeat the activity at length). This week, I experimented with presenting this activity to children who were significantly younger and it proved to be an enormous success. The younger children were absolutely enamored with the idea of actually being allowed to poke holes in something (at pickup time, I overheard one little girl tell her mother that she spent the day "poking," and excitedly pointing her index fingers at her mother for emphasis) and showed both surprising stamina and precision.

Punching has become one of the most popular lessons in the classroom and a calming way to pass these frigid winter afternoons.


Sunday, November 29, 2009

Bon Travail

The children have advanced a great deal over the past few months. So, much of my Thanksgiving break was spent putting out some new materials to provide new challenges for them and "commissioning" some new materials for the classroom (poor Josh).

Many of the children have progressed beyond the basic cutting lessons, so near the top of my 'to-do list' was a nice (preferably wooden) container for organizing cutting strips. I was so pleased with the way that this turned out (I really haven't seen a nicer way to organize and display them)!

In Montessori classrooms, children practice cutting with scissors using progressively more challenging strips (this is another example of the way in which Montessori materials isolate the difficulty). The child begins with narrow strips with horizontal lines and then progress to strips which require multiple cuts and turning the strip of paper.


I will be posting more photos of my new acquisitions in the coming days!


Wednesday, October 7, 2009

Cutting with Scissors

I also updated my cutting lesson with this nice little set (I really like the little wooden box for the scraps and the nice rounded stainless scissors- they seem better proportioned to the child's hand and the children were much more successful with them than they are with Fiskars).
Cutting with scissors is a very difficult task for young children. In Montessori classrooms, they cut strips of paper with progressively more difficult patterns of lines (moving from straight vertical cuts toward wavy lines which require them to turn the paper as they cut).


Pasting Lesson/Collage Box

I have been putting some effort into updating my art area of the classroom. Although I have seen numerous examples of art shelves and art materials in the course of my training and previous employment, I wasn't quite satisfied with the quality of my materials- many of which were made of plastic (which I try to avoid using whenever possible) or not as aesthetically pleasing as possible.

One example was the pasting lesson/collage tray that I have been using. The paper bits were stored in a plastic bin that I had purchased at a hardware store (for lack of something nicer) and the paste was stored in tupperware containers with slits in the plastic lids, as I had seen in my training. Montessori schools generally make a point of having children apply paste with brushes or small spreaders (as opposed to glue sticks or glue bottles) because it serves as one more opportunity for the child to develop their fine motor skills/pincer grasp for handwriting.

So, when I discovered this beautiful birch alternative- with a nice little wooden brush and a nice little glass jar (with a lid that they can screw and unscrew), I had to have it. So far, the lesson has been a big hit in the classroom- it is generally one of the first lessons off the shelf in the morning (and when someone dropped it while carrying it back to the shelf, it became a very nice sorting lesson).